Showing posts with label Nomnomnom. Show all posts

Tuesday, January 28, 2014

Baby It's Cold Outside!

Brrrrrr!  The heat is going, the fireplace crackling and I'm STILL about to freeze to death.  We are impatiently waiting on the dangerous 394 flakes of snow that are headed towards us here in central Alabama.  Well, maybe.  The forecast changes every 28 seconds.  Then again, it is Alabama so since it will be 9 degrees and snowy tonight that means there is every possibility in the world that it will be 72 and sunny tomorrow, 12 hours later.  Don't change ya clothes just yet.

We have been battling strep throat in this house for what seems like a small eternity.  Our December went like this:

Payton - Strep
Haleigh - Strep
Payton - Stomach Bug
Haleigh - Stomach Bug
Tanner - Stomach Bug
Husband - Stomach Bug
Haleigh - Fever virus

Moving on into January and finally Tanner takes his turn:

Tanner - strep AND
Payton - Ear and Sinus Infection

Today Haleigh and Payton are both snotty and I don't mean that as a description of their personality.

For the love of all that is holy and kind.  We have changed tooth brushes 27 times.  Washed sheets every single week.  Thrown out half of the house and IT IS STILL HERE!

I should own stock in Lysol and Clorox.  Yuck.

Anyway, so last night since it was so cold and talk of snow and sickness and more sickness and for the love multiple kinds of grossness going on in this house, I decided that it was CHICKEN NOODLE SOUP time. I've dedicated one night a week to a soup for the rest of the winter; the kids and husband are not pleased.  My mom and I, we can eat soup ALL.THE.TIME.  My husband and kids both turn their nose up at the very mention of 'soup for dinner'.  Last week the potato soup was a GREAT success!  They sucked it down and asked for more.  Payton gets in the car from wrestling last night and says 'I do NOT want chicken noodle soup can you please go buy me something from a restaurant (when she says 'restaurant' she pronounces every last syllable).  I told her no and she started to cry.  I let her cry.  Then I reminded her that she was nearly eight years old and crying over stupid chicken noodle soup.  She didn't care, she continued to cry.  We made it home and she cried all the way to the kitchen, looked in my beautiful mustard yellow Le Creuset stock pot and cried salty tears over my chicken noodle soup!  THEN THAT HEIFER HAS THE NERVE TO SAY 'CAN I HAVE THE KIND IN THE CAN'!!!! Um, come again little lady?  I then of course went into my standard culinary rant.  'I have a $40,000 piece of paper that says I have the right to make CHICKEN NOODLE FRICKIN SOUP and SELL IT, by gosh don't think your going to ask for CRAP IN A CAN'!  It's typical, they know to expect it.  How did this end you may ask?  She ate two bowls and asked for a third,  I cut her off due to lack of appreciation.

Anyway, hopefully you and yours will appreciate this amazing recipe because I will tell you....everyone loved it...I hope you love it too!

:::Chicken Noodle Soup:::
Olive Oil
1 T. Butter (Optional)
3 Boneless Skinless Chicken Breast
2 Onions: 1 Cut in chunks, 1 diced
4 Celery Stalks
16 Baby Carrots or 4 Big Carrots: 2 Chunky cut and 2 diced
1/4 Bunch of Parsley, Chopped
12 Cups of Water
Salt & Pepper
8 Ounces of Egg Noodles

In a preheated dutch oven bring olive oil and butter (optional) to a medium high heat.  Place chicken breast in skillet and sear on each side for about 3 minutes each.  Add in (all cut in large chunks, otherwise known as 'rough cuts') 1 onion, 2 Celery Stalks and 6 baby carrots or 2 large carrots, cook until veggies are sweated.  Pour 8 cups of the water over the chicken and veggies.  Cook until chicken is falling apart or falls apart when touched with your spoon.  As water reduces, start adding the remaining 8 cups of water.  This will concentrate the flavor.  Meanwhile, in a tablespoon of olive oil (heated) in a saute pan begin to saute the remaining diced onion, 2 diced celery stalks, 2 diced large carrots and parsley.  Once saute, turn stove top off and let sit.  Once all 8 cups of water have been incorporated, remove chicken.  At this point you can emulsify the veggies or remove them, I chose to emulsify because it acts as a bit of a thickening agent to the broth.  At this point, add salt and pepper to taste.  Your chicken broth should taste like it is now enjoyable.  Shred chicken or cut in chunks (whichever you prefer).  Add in sauteed veggies and noodles.  Cook for 7 minutes.  Serve.

Servings:  About 10 Bowlfuls 

Eat Yo' Soup,
Traci.

Sunday, January 26, 2014

Hot Dog Buns Recipe

I found this little recipe for hot dog buns and loved it.  The buns turned out fabulous.  I know what you are thinking...why am I not posting an original recipe?  Well - I am a chef but I am NOT a bread maker.  There is a HUGE difference.  I will be posting recipes hopefully very soon that are my very own but until then, I'll ALWAYS give credit where credit is due and this little lady - is awesome.  Her Julia Child voice will catch you off guard in the beginning but she is really great, I hope you appreciate her awesomeness.  Her videos are also great because they show you an angle of which you can actually see her working the ingredients, which my friends, is hard to find...I give you The Bread Kitchen's Titli Nihaan's recipe for Hot Dog Buns.......


Here is a little picture of how mine turned out; the family LOVED them.


I clearly should have folded the edges over a bit more but they were so good!  I will make one adjustment next time and probably throw in some honey at some point. So good.

I also made home-style fries that night.  I just took a cup or so of flour and added in some garlic and onion powder, about a teaspoon each and then about a table spoon of Tony Chachere's Cajun spice. Added about two cups of water (just enough to make the batter soupy).  Stirred it up really good, no lumps.  Then I cut some potatoes after peeling them into eights.  Dredged the potatoes through the batter and fried them in an olive oil / veggie oil mixture at medium high heat.  They cook in about five minutes.  Once they are golden brown, they are ready.  Pull them out of the oil and hit them with a pinch of salt WHILE they are hot.  Fry in batches, be sure NOT to crowd your oil or you will have a bunch of soggy fries or they will all be stuck together.

Dip the fries in the homemade ranch we made a few days ago and thank the good Lord above for fresh ingredients.


X's & O's.
Traci.


Saturday, January 25, 2014

Potato & Leek Soup Recipe

My kids like 'Chicken N' Noodle' and 'Tomato' soup by Campbell's.  The only soup they will eat are those two.  Well, once we stopped eating processed foods I had to stop buying them.  The first soup I made for them was potato and leek soup.   I was immediately met with resistance.  The first thing the ask me when busting through the door at 3:23 PM is 'what's for dinner' or 'did you fix us a snack'?  I said we are having potato soup.  Their responses ranged from 'WHAT, seriously?, I don't eat that' and my favorite 'what about the meat?'

One of my culinary school chef instructors Chef Denny Streeter made this amazing potato and leek soup one night on a whim.  I think it was extremely cold outside and since we had class at night everyone pretty much ate during class, whatever it was that we had cooked.  So on our cold Wednesday night last week I decided to try and yes, that soup has stuck with me for the past 8 or so years.  It was just THAT good.

So, I thought I would share the recipe instead of keeping all this goodness to myself.

Potato & Leek Soup
5 T. Butter
1 T. Olive Oil
1 Small White Onion, Diced
1 Celery Stock, Sliced
2 Leeks, Cleaned and Diced
2 Carrots, Cleaned and Diced
2 tsp. Garlic, Diced
8 Russet Potatoes, Peeled and Diced
6 Cups of Stock, Chicken or Vegetable
Salt, to taste
Pepper, to taste
3 T. Flour, AP
1 C. Heavy Cream

In a stockpot over medium high heat melt 2 tablespoons of the butter and olive oil together add in the onion, celery, leeks, carrots and cook stirring frequently for seven minutes until vegetables are well sweated. Add in potatoes and cook for two more minutes, coating with the other veggies.  Add in garlic and cook for two more minutes.  Poor the stock over the vegetables and bring to a boil.  Once at a boil reduce heat and cook until potatoes are completely cooked, stirring occasionally.  In a separate small pot add the remaining 3 tablespoons of butter, melt.  Whisk in 3 tablespoons of all purpose flour and whisk for two minutes.  Slowly add in the cream and continue whisking until thickened.  Set mixture aside.  Once potatoes are cooked thoroughly add in the cream mixture and stir till completely dissolved.  The soup will begin to thicken over the next few minutes.  Taste and adjust seasoning to your liking.  At this point you can take the soup and put it into a blender and blend it down or use an emulsion blender, which is what I did.  This allows you to leave the soup as chunky or as smooth as you would like!  Serve and enjoy!

Toppers:  Crispy bacon, cheese, sour cream and chives! Nomnomnom!


Oh and what did the kids say about it?  They devoured it.  Even Tanner, Mr. Picky eater himself.  It was so good and I believe I did Chef Streeter proud.  'I don't eat that' quickly turned into 'Can I have more'!  I hope your family enjoy's it as much as mine did.


Much Love,
Traci


Wednesday, January 22, 2014

Honey White Wheat Bread

I have to tell y'all.  I haven't baked a loaf of bread since culinary school.  I must have watched 22 tutorials before I gave it a go.  So after 2 hours of letting YouTube fire me up enough to get started - I couldn't find my dough hook.  I.COULD.NOT.FIND.MY.DOUGH.HOOK.  So I began to feel uneasy.  Again.  I gave myself this pep talk:

Traci.  You are 3 years old.  Thirty THREE years old.  You can and you will get in that kitchen and make that bread.  You know why?  Because since your genius self said "if it is something we can make, then we are going to make it, not buy it"....Yeah, where did THAT nonsense come from!  So get your butt in gear, march to the kitchen and KNEAD.THAT.DOUGH!

So my YouTube search turned from 'making bread from scratch' to 'making bread from scratch without a dough hook'.  True Story.  Since it was my birthday, I was feeling overly confident.  But let me tell you what:  this girl made some bread and it was f-a-n-t-a-s-t-i-c.  I mean, not only good - it was freaking GREAT!

Oh did I mention that after I couldn't find my dough hook then I suddenly couldn't find my loaf pans.  Yeah - great.  Just flipping great.  Anyway, back to the recipe.   I am in love.  I am in love with bread and with this recipe.  If you make this bread and eat it hot with butter, then you eat it later with a piece of ham slapped in the middle...but wait, then you decide to eat toast for dinner just.so.you.can.eat.it.again!  It is/was so good...I can't eat store bought chemically injected bread again.  No way!  Like - it's not even the same thing!!!!  Just give it a try! You.CAN.Do.IT!!!!

:::Honey White-Wheat Bread:::
:::Ingredients:::

-2 Cups Warm Water (NOT hot)
-1 T. Active Dry Yeast
-1/3 Cup of Oil + More for Rubbing
-1/2 Cup of REALLY good Honey (Local is best)
-1 tsp Salt
-3 Cups of Wheat Flour (I like King Arthur)
-3 1/2 C. White Flour, All Purpose

(1) Add warm water and yeast in a mixing bowl, let set for five minutes to proof the yeast.  Add oil, honey and salt to the water and yeast mixture.  Add in the wheat flour.  Add in the white flour.
(2) After mixing well, flour your surface and turn dough out.  *Knead the dough for ten minutes.  Form into a ball, leave in mixing bowl, rub oil over the top of the ball and finally, cover the dough (while still in the mixing bowl) with a clean cloth or plastic and stick in a warm corner.**   Let the dough rise for an hour to an hour and fifteen minutes.  
(3)  Once it has doubled in size, PUNCH it down and then separate into two even size dough balls by cutting with a knife or dough cutter.  Flour your surface and knead the dough a few times getting rid of any large dough bubbles.  With a floured rolling pin spread the dough out in to a rough rectangle about the width of the bread pan.
(4)  Tightly roll the dough and pinch the ends into the roll.
(5)  Place the dough in a greased bread pan with the seam down.  Repeat for the second ball.  Lightly rub the top of the dough with a little bit of oil and cover again.  Allow the dough to rise until it has risen about 1" above the bread pan.
(6)  Bake at 375 degrees for 25-30 minutes.
(7) Remove and let cool in the pan for five minutes then turn out onto a cooling rack until completely cooled.  Wrap tightly in plastic and place in an air tight container for maximum quality!


*To knead: you have your dough ball, with the heel of your plams you push down and forward, fold the dough over and turn a quarter to the right.  Repeat. Repeat. Repeat 2 million more times.

**It was a really cold day the day that I made the bread so I preheated my oven to 170 degrees and then turned it off before putting the dough in them mixing bowl in the oven to rest and I propped the door open.

Y'all.  Delicious. I mean, there is absolutely no other way to describe it!  So if you are wondering why my loaves do not actually resemble bread loaves....well because I could never find the pan.  I had to use a smaller casserole dish as an improvisation.  Also - I went for the artisan look.  If you want, you can whisk up an egg white and paint the top of the bread about mid way through your cooking time.  It will be all pretty and shinny.  Another option for a topper is to do the egg white and then sprinkle a mild cheese..mozzarella would probably be a great choice!  Just stay away from a cheddar because you are going to get a really yummy strong honey flavor in the bread and the two together would not be all that great.  In fact, it'd probably be pretty gross.

                                  Save a life.  Make your own bread.
                                  (I don't know, it just sounded funny in my head),
                                                             Traci
                                              Aka:  The Bread Maker

Gettin' A Little Saucey Tonight

So, you know that moment in time when you're like (say this in your best Valley girl voice) 'OMG I'm totes out of Ranch dressing, like, what the heck Beck'.  Then this shiny little light bulb goes off 'ding!!!!' and you think 'well I guess I can mix the little packet thingy with the sour cream stuff and totes not look at the calories'.  THEN you go to the drawer to pull out the 'packet thingy' and there is no packet thingy.  Dilemma!  So you walk over to the ol' laptop, desktop, iPad, smartphone, TV app, or whatever is handy and you hit the information superhighway AND you pray to the sweet Lord Jesus that you have whatever is necessary to make some good ol' REAL Ranch Dressing.  That is when you stumble upon this little valuable piece of information, right....here.....wait for it....wait for it.....

:::Ranch Dressing:::
'The REAL Deal'.  **Adapted from the Pioneer Woman's Ranch Dressing Recipe**
Ingredients:
2 Garlic Cloves with a 1/4 teaspoon of salt to make a paste*
1 C. Mayo (I used homemade mayo)
1/2 C. Sour Cream (I prefer Daisy)
1/4 C. Flat Leaf Parsley, Minced
1 tsp. Dill, Minced
1 T. Chives, Minced
1 T. Worcestershire Sauce
1/2 t. Black Pepper (Fresh or Pre-ground)
1 t. White Wine Vinegar
1/4 t. Paprika
6 Dashes of Tabasco (or your favorite hot sauce)
1 C. Buttermilk

Mince all your ingredients that are 'minceable' and whisk all ingredients together! Easy peasy! Refrigerate. For best taste, refrigerate overnight.

This is slap your mama good.  Sorry mama.  I said, "I'm sorry mama"....don't ever say I haven't sang for you because this recipe just had me busting out the Eminem.

Then I thought, hmmmm, I might as well go ahead and make the other two macdaddy of dressings, right?  We are going all homemade so let's get er' done!

**Garlic Paste:  mince your garlic into tiny pieces, add salt, rub your knife blade back and forth, clean mixture off your knife and add back into pile...rub back in forth, mash, smear, combine into a paste.  For the love of God do not, I repeat NOT cut your finger off!

 :::1000 Island:::
Ingredients
3/4 C. Mayo (Again, I prefer homemade)
1/2 C. Ketchup
1/3 C. Sweet Pickle Relish
1 1/2 T. Prepared Horseradish
1 t. Red Wine Vinegar
Hefty Pinch of Salt
Hefty Pinch of Pepper

Combine and whisk!  You'll never buy store bought again!


:::Italian Dressing or Marinade:::

Ingredients
1 C. Olive Oil
1/2 C. Red Wine Vinegar
2 tsp. Garlic, Minced
2 Garlic Cloves, Whole
3/4 tsp. Fresh Italian Parsley, Minced
1/2 tsp. Celery Salt
1 tsp. Italian Seasoning
1 tsp. Minced Onion
1/4 tsp. Onion Powder
1/8 tsp. Salt
1/8 tsp. Pepper

Combine all ingredients.  Whisk.  Taste a sample and adjust seasoning accordingly.

Okay - I have to admit.  I'm not big on Italian dressing; it is number 2,985 on my list of top 2,985 dressings.  Just sayin'.  This recipe is AMAZING as a marinade.  Take a couple of steaks and marinade them over night or at least for a couple of hours.  Magnificent!

ALL Dressings will last up to a month!  Make sure if you use store bought ingredients that you check expiration dates.  Each recipe made between 1 1/2 cups to 2 cups total.


So that is it for the SAUCIEST story of the week! Ha! See what I did there?  Check back in a few days for homemade recipes on mayonnaise, ketchup and mustard....ya know you want too!

                                                                         Go get your sauce on!
                                                                                Traci Silloway

Sunday, January 19, 2014

Maple Glazed Oven Roasted Pork Chops

In our attempt to rid the kitchen of all the prepackaged convenient items we are getting down to the bare minimum.  I had a pack of pork chops that I purchased a few days back and as I was cleaning out the massive collection of spices that I have accumulated over the past year or so, I found some rather tasty pure Maple syrup.  I thought, what the heck.

Maple Glazed Oven Roasted Pork Chops

1 Pack of Chops, Whichever tickles your fancy...I used a bone-in pack of 12.  
Olive Oil
McCormick's Grill Mates Smokehouse Maple Seasoning
1 T. Butter
1 Small Onion, Minced
1 tsp. Garlic, Minced
1/2 Cup of Good Maple Syrup
1/2 Cup of Water
1 T. Soy Sauce
2 T. Brown Sugar (Light or Dark)
1 t. Chili Powder

In a skillet heat a smidgen of Olive oil (you can use what ever oil is handy) over medium heat.   Preheat over to 375 degrees. Take the maple seasoning and rub into both sides of each pork chop.  Once the oil is ready begin searing off each side to a light golden brown, do not cook all the way through.  As you sear all the chops place them on a lined deep sided cookie sheet or casserole.

In a small sauce pot add in the butter.  Once the butter has melted add in the minced onion and cook for one minute over medium heat, add in garlic, cook an additional three minutes until onion is translucent.  Do NOT let the onion or garlic burn.  Once the garlic and onion have sweated add in the maple syrup and water.  Bring to a boil.  Add in soy sauce, brown sugar and chili powder.  Stir over medium high heat at a boil for about four minutes until the sauce is well combined and begins to reduce.  Reduce heat to low in order to reduce further for about 8 minutes.

Remove from heat.

Take a barbecue brush or mop and mop each pork chop with the glaze. 

Cook for ten minutes at 375 degrees, turn over and mop again.  Cook for an additional ten minutes.

Remove from over and let rest for 10 minutes before serving.  There will be additional sauce in the cookie sheet or casserole dish that can be spooned over the chops while resting and at service.

Yumm-o.

I need to apologize in advance for the picture....the kids attacked the food and I could only take a picture of the leftover 2 chops (out of 12).


                                                                                                Peace, Love and Broccoli Rabe-
                                                                                                            Traci

Saturday, January 18, 2014

Chicken N' Waffles YO!

Okay, so I was totally skeptical.  Totally.  I have read and seen all the yummy goodness that surrounds 'Chicken and Waffles'.  I honestly thought it couldn't be so.  As I mentioned in previous post we are attempting a more clean eating regiment which really consist of knocking out boxed convenient foods.    Any attempt to keep out the chemicals used to preserve food is a good attempt in my book.  So anyway, I had box of Krusteaz waffle mix and it is my favorite in a pinch.  I also had some chicken breast that I had recently purchased ON SALE of course because let's be honest, who can afford boneless skinless chicken breast for a family of six these days without putting an extra mortgage on their home.  Really.  So I thought to myself....JUST DO IT....just go AHEAD and make the waffles and slap the piece of good ol' FRIED chicken yumminess on it! JUST DO IT!  AND let me just say, oh my goodness for all that is kind in the world, for all that is fair and equal about our great land - IT WAS FABULOUS, better than I thought it would be if I had only given it a small smidgen of hope...it was AWESOME!

Go ahead and make your favorite waffle recipe.  If you need one, please let me know in the comments below and I'll give you my best one.  Make the waffles a little extra crispy so that it can withstand the chicken.

Then, make this chicken.  This crispy, slap yo' mama fried chicken.

Ingredients:
6 Chicken Breast, Boneless & Skinless
Veggie Oil for Frying
2 Cups of Self Rising Flour
1 t. WHITE Pepper
1 t. Poultry Seasoning
1 t. Cayenne Pepper
1 t. Salt
1 t. Onion Powder
1 t. Garlic Powder
4 Eggs, Whole
Splash of Worcestershire Sauce
Pinch of Additional Salt
Local Honey

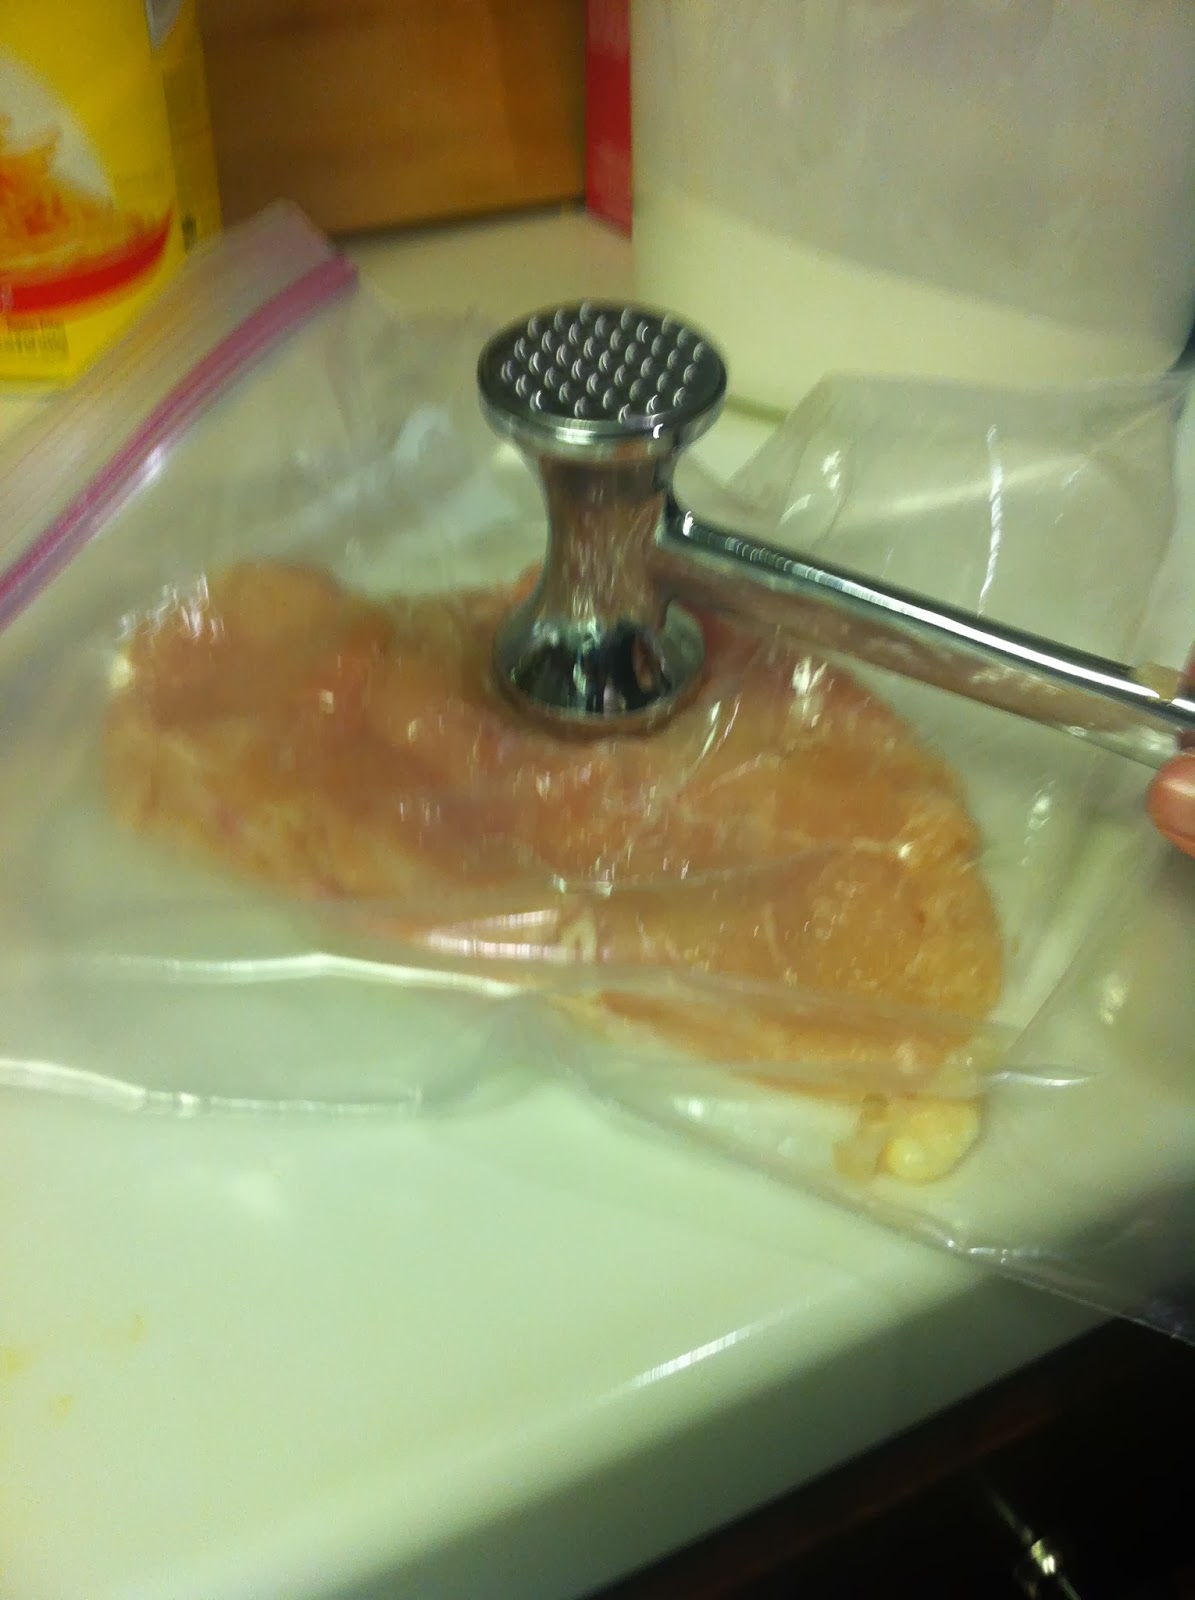
Special Equipment:  Large Ziploc Bag and Meat Mallet

1.  Clean the chicken with a cold water rinse.  Pat dry with a paper towel.  Set aside.
2.  Go ahead and place about 1" of oil in a chefs pan or deep sided skillet.  Turn heat on medium heat.  Allow oil to heat slowly but DO NOT get it too hot.
3.  On a clean dredging dish or plate add flour, pepper, poultry seasoning, cayenne, salt, onion powder and garlic powder.  Mix well with a fork or wire wisk.  Be careful not to throw the flour mix all around!
4.  In an additional dredging dish or deep sided dish crack all four eggs and add Worcestershire sauce.  Mix well.
5.  Take your first piece of chicken breast and place it inside of your ziplock bag.  Beat it half to death with the mallet.  Pound it till about 1/4" thick.
6.  Dredge the pulverized breast into the flour mixture, shake the excess flour off, dip into the egg wash covering with the mixture, shake off excess and dip in the flour mixture again, shake excess off.

7.  Carefully and slowly place chicken breast in the heated oil.  It should sizzle and you will immediately be able to smell its yummy goodness.  OH it is so good.  That smell!
8.  Cook chicken breast for about 4-5 minutes until golden brown then flip to the other side, again, carefully as to not splatter the hot grease.  Cook another 5 minutes until golden brown.
9.  Place cooked chicken breast on a paper bag or paper towels to drain excess grease.
10.  Put your cooked waffle on the plate, top it with the amazing chicken breast you just cooked and then drizzle the best local honey that you can find.

It should look a little something like this.......
 PLUS......
 
 :::::::::::::::::EQUALS::::::::::::::::: 

This is the mother of ALL goodness.  The End.

Peace, Love & Chicken Grease,

Traci


Saturday, January 11, 2014

What's Shakin' Bacon?!

I made the best.pasta.ever on Friday night.  Oh it was Heaven in a pot, love on my plate, party.in.my.mouth! It was divine.  As in, there were some major Divine intervention going on in my kitchen when all this came together.  You wanna know the key ingredient don't ya?  Bacon.  Need I say more?   So, for all the bacon lovers out there, get ready to gitcha bacon on.  Ohhhh, I'm bringing sexy back, right...about...now.

Bacon Pasta...Just go with it.

Ingredient List
1 Lb. Bacon, 1" Diced
1 Lb. Egg Noodles, Cooked
1 T. Olive Oil
1 Onion, thin sliced
1/2 Green Cabbage, thinly sliced-cut the cabbage in half and then shred thinly with your knife
2 tsp. Garlic, minced
2 tsp. Apple Cider Vinegar
1/2 Cup of Stock
Pinch of Salt
Pepper
Parmesan Cheese, Shaved


Bacon SMELL
1 Lb. of the best bacon you can find.  My favorite bacon is the Apple Wood Smoked Bacon from DJ's Fine Meats in Alabaster (Alabama).  I love this little meat market.  So you take this bacon and you are going to cut it into 1" pieces.  Throw it all into a pot that has been heated to a medium high heat with one tablespoon of olive oil.  Immediately when the bacon hits the pot this sizzle, pop, pop action is going to happen and that whiff of bacon-y love is going to pelt you in the face and you are going to 'ahhhhhhh, that smells soooo good'.  Make sure you take a wooden spoon and spread the pieces out evenly so that it doesn't steam but gets very crispy. You can slowly turn the heat up towards the high side but keep an eye on the bacon.  Meanwhile...

Bacon & Onions
Bacon-y Goodness
Throw the sliced onion in and cook for one minute.  Add the shredded cabbage next and toss to coat in the bacon-y love. Toss in garlic and cook till golden, one minute.  Add the apple cider vinegar, stock (chicken or veg), pinch of salt and the amount of pepper that is perfect for you!  Reduce for 2 minutes.  Your mixture should be well coated with the bacon-y love at this point. Turn that burner OFF!  
Mixed Together

Cook 1 lb. of Egg Noodles (or your favorite pasta) according to package directions and drain.  Once the pasta has been drained you are going to combine the bacon cabbage mixture with the pasta and just fold it in until well combined.


Plate it up and top with shaved Parmesan cheese.


This is amazing, fantastic, no, it is phenomenal.  Not healthy, but still....phenomenal.  

           Love, Peace & Bacon Grease,
                                                  Traci


Thursday, January 9, 2014

Don't Be Chicken...

We have a saying in our home......


It amazes me that even though I have a very expensive culinary degree that says 'call me Chef'', my kids STILL will beg for McDonald's, Captain D's or Taco Bell all.the.time!  It's so annoying.  I say the same thing every time, 'YOUR MOTHER HAS A VERY EXPENSIVE CULINARY DEGREE AND YOU WANT FREAKY MEAT FROM MCDONALDS"???? What?!

It doesn't happen often.  In fact, part of our 'lifestyle' change in the Silloway house has been to eliminate eating out.  Its just so convenient during sporting seasons...but just so bad for you!  We have eaten out once in the past couple weeks and that was because I was feeling like crap-ola and its my job to do the cooking so I sprung for chicken sandwiches instead.  You would have thought the kids won the lottery.

Since Wednesday night is our only free night, I have decided to start making it a theme night...my theme is Gourmet Wednesday.  Exciting isn't it?  Okay, so it is exciting for me.  Last night was the first Gourmet Wednesday night meal and we had Sauteed Chicken Breast with Fresh Veggie Risotto over a bed of Caramelized Onions topped with a Hollandaise sauce.  One word for you: nomnomnomnomnom.  It was so good.  Payton, my sweet child was fired up; she was so very excited.  Haleigh said 'I want that yella sauce mama and just the chicken'.  I immediately said, 'it doesn't work that way'.  Tanner said 'oh gahhhhhh I'm eating cereal'.  He is NOT so much on the fancy.  I told him that surely he was not going to be eating cereal and he could go ahead and sit his rear down in his seat.  He pouted but he got over it rather quickly.   I plated the dish and served it.  Doug, the hubby licked his bowl clean (actually just ate the leftovers tonight), my Mom even enjoyed it and for those of you that know her, you know that is a sheer miracle in itself.  Payton was excited about her fancy dinner and ate it 'all gone gone', Haleigh pitched a holy fit because she didn't like the Hollandaise. We stirred it up and she was fine.  Tanner.....well, he was hungry when he went to bed.  He at the chicken but decided against the rice because of the asparagus, it was foreign to him.  

We do have the rule that you can eat what mom is serving or you can not eat.  It is a pretty simple rule.  I'm not going to MAKE my kids eat but they aren't going to tell me something is gross when they haven't even put a spoonful in their mouths.  They threaten to 'not eat' and then I threaten to 'not care' and I constantly remind them that breakfast is just around the corner from dinner.  

So, I wanted to share my recipe with y'all because it was so good and easy to do.

The chicken breast were purchased on sale at Publix during their fantastic buy one get one free sale.  So seven breast were right at six dollars.  

Saute Chicken Breast:

Boneless Skinless Chicken Breast
Olive Oil
Butter
Salt and Pepper

This is just a standard saute.  I cleaned the chicken breast and trimmed the skin and fat, patted them dry and sprinkled the salt and pepper over the one side.  In the heated saute pan (medium heat) I added a little olive oil, one circle around the pan and put the breast in (you should have a snap, crackle, pop going on).  Remember, do not overcrowd the pan because it will steam your chicken not saute it.  Get a good sear on it and turn it over. Towards the end of cooking I add a pat of butter.  I don't add it earlier because butter burns a lot quicker than oil.  If you add it at the end then it will just flavor the meat.  Cook remainder of chicken. Put into a dish and cover with tinfoil for holding, this is also known as 'resting'.  Chicken should temp at 160 degrees. If not, the next day chances are you will be in a Salmonella induced puke fest.  Enjoy.

While your chicken is cooking you can go ahead and start the Caramelized Onions:

1 Onion, thinly sliced
3 Garlic Cloves
2 T. Butter
1 T. Olive Oil
Salt & Pepper

Slice the onions not paper thin but still thin.  Mince garlic.  Heat olive oil and butter over a medium heat.  Once butter has melted toss in onions and saute for two minutes, add in raw garlic.  Once garlic has been added cook until it turns golden.  Garlic burns easily.  Burnt garlic will ruin the entire pans contents.  Once garlic has been cooked sprinkle with a pinch of salt and pepper.  Evenly disperse in the bottom of your bowls or serving dishes.

Start your Risotto. 

Olive Oil
1 Onion, Diced
14 Asparagus Stalks (Snap where the stalk bends), Diced in 1" pieces
2 Cups of Aborio Rice
6 Cups of Stock (Veggie or Chicken)
Salt and Pepper
Parmesan Cheese

Saute the onion and asparagus for two minutes in the olive oil.  Add in the Aborio rice and continue sauteing for three minutes.  Add in two cups of the stock.  YOU MUST CONTINUALLY STIR THE RICE ONCE YOU ADD IT INTO THE PAN! DO not STOP STIRRING!!!  Once the rice has absorbed the stock begin adding in the remainder of stock one cup at a time.  Once all stock has been absorbed add in as much or as little Parmesan that you want but remember Parmesan cheese is VERY salty.  After the cheese has melted, taste and add salt and pepper to taste.  The texture should be al dente but creamy and oh.so.good.....

Hollandaise Sauce

Do this last, its quick.

4 Egg YOLKS
1 Stick of Butter, Melted COMPLETELY
1 T. Lemon Juice, Fresh
4 Shakes of Tabasco or Favorite Hot Sauce
Salt and Pepper to Taste

This will 'break' easily so be sure to follow the instructions exactly and do not attempt to improvise.  

Simmer water in a pot (that will be holding your stainless steel bowl), making a double boiler kind of scenario.  Just have it ready.  In a stainless steel bowl whisk your separated eggs and lemon juice together until doubled.  WHISK it girl WHISK IT!  Once doubled, hold the stainless steel bowl over the heat and continue to whisk.  The best thing to do at this point is have someone drizzle the melted butter in and you continuously whisk.  If not possible then pour in a little butter and whisk, repeat until butter is done.  This is the point where most hollandaise break.  If you pour all the butter in at once then there isn't any hope, I can guarantee that.  Drizzle, drizzle, drizzle!!! Its a must.  Keep whisking till sauce has thickened.  Once it has thickened remove it from the heat and add it the salt and pepper to taste and a few shakes of Tabasco.  Whisk till combined.


Plating:

Bottom:::Onions on bottom,
Next::::::::Veggie Risotto
Next::::::::Chicken Breast, Sliced or Whole
Bottom:::Drizzle of Hollandaise


Please forgive the terribleness of my iPhone camera.  It sucks.  I'm aware.

Your Welcome.

I encourage you to try different things at home.  It doesn't have to be Gourmet Wednesday but could be as simple as Taco Tuesday.  A family that eats together.......gets fat.  Ha! I kid.

                                                                                     Ciao! 
                                                                                           Chef Traci Lyn


Friday, January 3, 2014

Mr. Crabs

I bet that title caught your attention!  No one in the house has crabs, just calm it on down.  Simmer.  Okay, so I wanted to share with y'all our dinner entree for tonight.  This is my moms famous dish that I have always enjoyed.  We typically eat it with Maw Maw's mushed up stuff but went a different route tonight.  These salmon patties are gold.  Serious biznas.  Gold.

My kids aren't about to eat SALMON patties, are you serious???  Dead.  Does your child watch Spongebob?  Well, Mr. Crabs presents to you: CRABBY PATTIES!  Oh yeah, its a total lie but hey, they eat it and they LOVE it!

Crabby Patties
(No crab needed)

2-14 Ounce Cans of Salmon (We like Double Q)
2 Eggs, Gently Beaten
1 Small Onion, Diced
3/4 Cup Yellow Cornmeal
1/2 Cup Evaporated Milk or Half and Half
Salt & Pepper To Taste
Oil for frying

Before Frying
Golden Brown
Drain the salmon really well but do not rinse it.  In a large bowl mix together the remaining ingredients.  Fold in the drained salmon. You may need to add more cornmeal or more milk depending on the texture of the cakes.  You want them to be moist but held together.  Heat your oil on medium heat, only use enough oil to lightly cover the bottom of the skillet.  We use veggie oil.  Patty out 2 ounce patties, about the size of your palm (small palms).  Then place the patty into the heated oil.  Fry for several minutes on each side until golden brown and thoroughly cooked.  Drain on paper towels or of course a paper bag works just as well.  Serve hot.  My kids eat them with                                                                                 ketchup.

Break a piece off, put it in your mouth, chew and say                 'mmmmmmm......soooooo......goooooood'.                                  
                             Your welcome.


                                                                       Gitcha Crab On,
                                                                                     Mrs. Crabs


Wednesday, January 1, 2014

ChurrO Soooooo Good!

Churro Waffles


Shut your mouth! 
No wait, open it, and open it very wide because these are 
SO DIVINE!

Makes 8

Ingredients:
-1.5 teaspoon salt
-6 teaspoons baking powder
-3 tablespoons granulated sugar
-3 eggs
-3 cups of all purpose flour
-2 1/4 cups warm milk
-1/2 cup butter, melted
-1.5 teaspoon vanilla extract
-5 shakes of cinnamon

Churro Topping:
-1.5 cup of granulated sugar
-3/4 cup cinnamon
-1 cup of melted butter (do not combine with sugar and cinnamon)

Directions:
1.  Preheat waffle iron.  2. In a large bowl, mix together flour, salt, baking powder and sugar.  3.  In a separate bowl, beat the eggs.  Stir in the heated milk (luke warm, NOT hot), melted butter and vanilla.  4.  Pour the milk mixture into the flour mixture; fold in 5 shakes of cinnamon until well blended (do not over blend).  5.  Melt the 1 cup of butter for dipping and pour into a deep sided dish or plate.  6.  Combine the sugar and cinnamon for the churro topping and pour into a large plate.  7.  Spray the waffle iron with a no stick spray and ladle in generously the waffle mixture.  Once fully cooked and golden brown, remove and dip in the melted butter, next dip into the cinnamon sugar mixture.  Optional:  Dip both sides :)

Serve and Devour IMMEDIATELY! 

Yummy Waffles = Happy Kids
Happy Kids = Happy Mommy

#truth


Peace, Love & Golden Brown Churros,
                                  Traci L. Silloway